Custom White Balance & Underwater Photography
Custom white balance can be intimidating or confusing to an underwater photographer, but it is an essential element for capturing great ambient-light images and videos (shooting ambient-light refers to using the available sunlight with no strobes or video lights). Many point-n-shoot and all current DSLR cameras have the ability to set a custom or manual white balance. It is a fairly simple process and should become “second nature” for underwater photographers. What is white balance? Why should I use it? How do I set it? When do I need it? This article simplifies it all and breaks it down for you!
What is white balance?
White balance is a concept of color temperature. Color temperature is a way of measuring the ratio of blue light and red light within an image. A light with higher color temperature (more blue) will have a higher Kelvin value, while light with a lower color temperature (more red) will have a lower Kelvin value . A color temperature of 5500 – 6500 K is average daylight. White balance is a camera setting that adjusts for the current lighting conditions in order to make white objects appear white in photos & videos.
Why should I custom white balance?
Custom white balance is used to achieve the most accurate coloring in an image as possible. To the human eye, a white object looks white regardless of the type of lighting. However, digital cameras can get confused with white resulting in unnatural looking colors (especially underwater). When we set a custom white balance, we are essentially telling the camera what “white” is. By doing this, the camera re-calibrates the spectrum of colors based on the white we imported. This renders the proper colors as we expect to see them.
Digital cameras offer a menu of different white balance options. Some of these options include: auto, tungsten, daylight, cloudy, flash, fluorescent, shade, underwater, or custom. Avoid using the ‘auto’ white balance setting (for ambient light images & videos). Auto does a decent job when shooting with strobes or video lights but it has a hard time accurately evaluating the color white in ambient light underwater. Therefore, your best choice is to use the ‘custom’ white balance setting and import the data manually. If custom white balance is not available on your camera, then choose either the underwater (if available) or cloudy settings.


How do I custom white balance?
White balance can be set a couple different ways. If shooting still RAW files (recommended if available), a custom white balance can be done in post editing (Photoshop, Lightroom, your camera’s software, etc.). However, if you’re shooting JPEG or HD video, these highly compressed file types should be shot as accurately as possible. Some color adjustments can be made during post editing, but adjusting white balance in post is not as accurate as adjusting the white balance “on the fly” (while shooting).
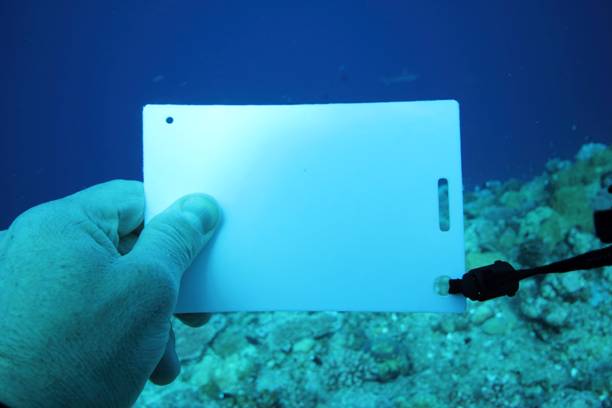
Setting the white balance “on the fly” is easy to do. Many point-n-shoot and mirrorless cameras have “one touch” white balance. Basically, set your camera to the custom WB icon, point the camera at something white (slate, sand, white fins, your hand, etc.) then press either “function”, “menu”, “shutter”, or whichever button your camera requires. Each camera has its own way of setting a custom white balance so refer to your manual for the proper procedure.
For DSLR cameras the process may involve a few steps for setting a custom white balance. Generally, you have to take an image of something white, import that image as the custom white balance data then select the custom WB icon. Again, refer to your camera’s manual for the exact procedure.


When do I custom white balance?
It is important to white balance under the lighting condition you are shooting in! Therefore, since light conditions can change every 10′-15′, so should your white balance settings. A new custom white balance should be imported every 10’-15’ because different colors are absorbed at different depths (remember your Open Water class?). This means accurate white color will change as your depth changes and its up to you to let your camera know what white is!
Here are some basic steps to set a custom white balance:
- Turn off all strobes & lights (remember: custom white balance is used when shooting in ambient light conditions)
- Put your camera in any auto mode (this will ensure proper exposure and an accurate white balance) or properly set exposure using your EV meter, if in manual mode.
- Take an image of something white using a slate, fins, sand, etc.
- Import that image as your white balance data (refer to your camera’s manual for precise steps)
- Re-white balance every 10’-15’ of depth change
Tips and reminders when shooting ambient light images:
- Have something to white balance off of (slate, fins, etc)
- Re-white balance every 10′-15′
- Keep the sun to your back
- Point your camera at a slightly downward angle (this takes full advantage of the available sunlight)
- Remember to switch back to AUTO white balance when using strobes or video lights (if you don’t you’ll get a lovely and unnatural red image)
Get the most out of your photography by knowing how and when to set a custom white balance for any lighting scenario. Your ambient light images and videos will and dazzle your family and friends! Guaranteed.

