How to: Blue water backgrounds in your photos
 A photographer, who has been shooting for a while, recently asked, “How do you get those deep blue backgrounds in your images?” What a great question! There is so much that goes into capturing an image that the background is often the last thing on a photographers mind until they get to post editing and realize their background is not what they had envisioned! If chasing the perfect blue background has left you frustrated with washed out images and odd greens and blues, this article should help combat your struggles.
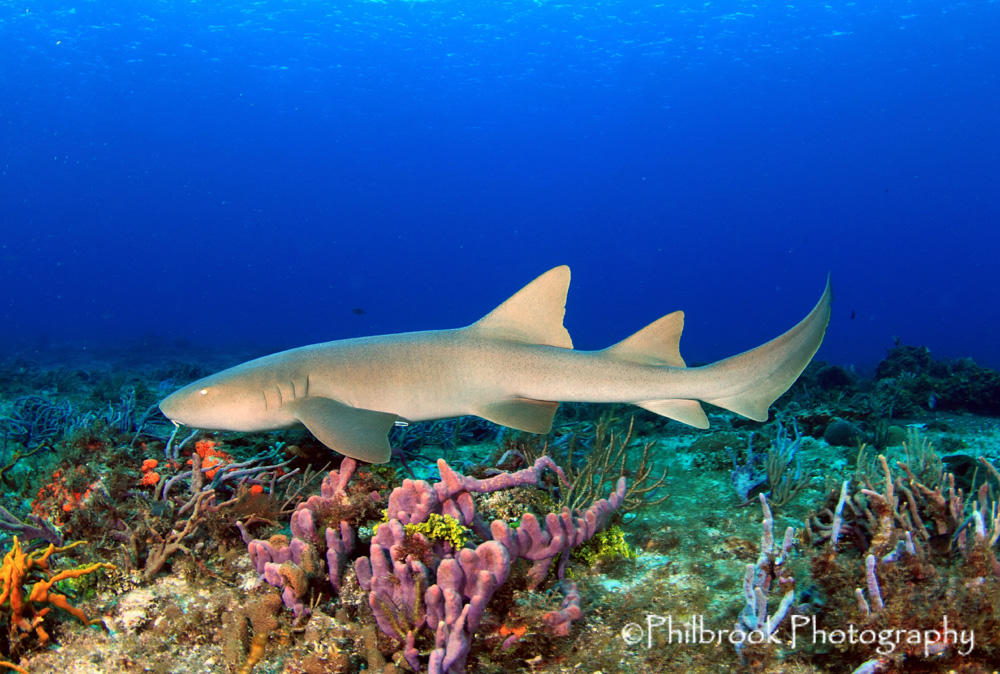
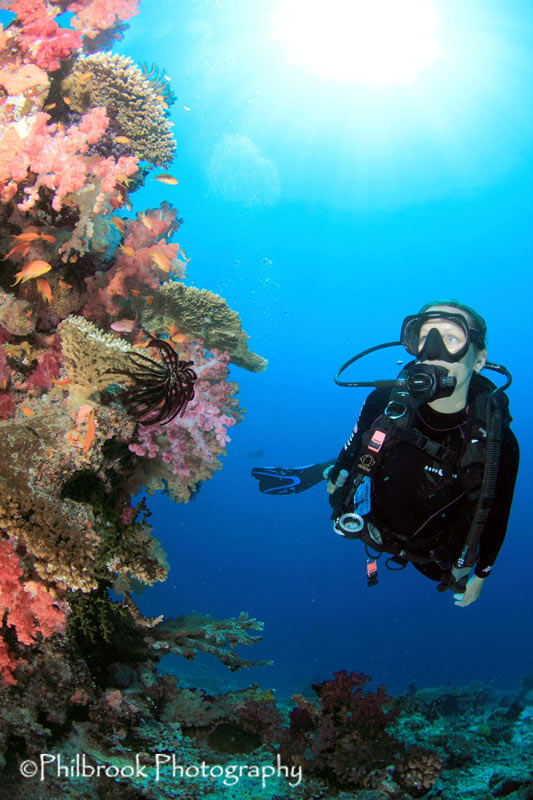
Getting a nice blue water background is fairly easy; however, it does require some thought. While composing your image, you should consider it in two parts: the background and the subject. Each requires their own light source in order to achieve the proper exposure. Ambient light or sunlight will light the water column giving the water that deep blue background. Your artificial light, or strobe(s), will light your subject.
Once you have established the background and the subject, you’ll need to take your camera out of AUTO mode. AUTO mode DOES NOT work well when trying to achieve brilliant blues underwater! AUTO mode will attempt to properly expose the entire image by only accounting for one light source and often gets confused in the evaluation process. I highly recommend shooting in manual mode for this reason. Manual mode unlocks the full potential of your camera system and will put complete creative control back in your hands. If you’re shooting a point-n-shoot digicam that doesn’t allow manual mode, choose either Shutter Priority or Program mode as opposed to AUTO. These modes will allow you to use Exposure Compensation and adjust the exposure as outlined below.
Second, you’ll need to be able to understand your camera’s light meter: how it works and what it is telling you. If you are not familiar with this, please see your camera’s manual. Once you have this general knowledge, you can begin effectively using the light meter. We will use the light meter (otherwise known as the EV meter) to take an exposure reading off the blue water (background) within the image. Whenever I want to make an adjustment to my blue water background, it is achieved by adjusting the shutter speed. In fact, I like to call the shutter speed dial the “blue water dial”. When the sun is straight above me or to my back, I generally set the exposure so the meter reads -1/3 to -1/2 stop underexposed using the shutter speed dial when shooting in manual mode. If shooting in Shutter Priority, set the shutter speed to 1/125 or 1/160 with the exposure compensation (+/- button) at -1/3 to -1/2 stop underexposed. In Program mode, you will only be able to set the exposure compensation. No matter the mode, aim past your subject into the blue water and adjust your settings as stated above. By doing this, you will have set your camera to let the ambient light underexpose the blue water background slightly. This slight underexposure will deepen the blue water without making it too dark, which in turn eliminates the washed out look that AUTO mode tends to render. Now if you aim at your subject and take a test picture, your background should have a nice deep blue color but your foreground will be dull and underexposed.


Your next step is to properly light the forefront of your image. This is where your strobe(s) come into play. The reason we need the strobe is to separate the foreground from the background in the image. To do this, you will need a good quality high-powered strobe. There are a number of popular choices on the market that will work well. Any of the INON strobes, especially the Z-240, the Ikelite DS-161, and the Sea & Sea YS-D1 work exceptionally well.


As you compose your image and adjust your strobe’s output for the desired subject exposure, you should have the result you’re looking for: a well balanced image. Your strobe will properly illuminate the subject and the ambient light will give you that blue background you so desire.


As you dive deeper into perfecting your photos, it is important to learn your camera and strobe setup. Once you know your tools, breaking an image down into two parts will ensure your exposure is correct throughout. Yes, it takes time and patience to become familiar with your shutter speed and strobe output results, but trust me, it is worth it! Before long those elusive deep blue backgrounds will be beckoning all those topside admirers! Keep shooting! There’s more to this art than a simple click-and-go. With practice and perseverance, you may even amaze yourself with what you can do!

